How to Prevent Root Rot in Balcony Pots: Drainage Tips
Balcony plants showing yellow leaves and stunted growth? Root rot is the silent killer. This guide covers foolproof drainage tips to keep your container garden thriving.
Recognizing the Early Signs of Root Rot
Root rot can sneak up on even the most attentive balcony gardener, but catching it early makes all the difference. One of the first clues is yellowing or wilting leaves, even though the potting mix feels damp. This puzzling symptom occurs because damaged roots can’t deliver water effectively. If you gently slip the plant out of its pot, healthy roots should be firm and pale, while rotting roots turn soft, brown, and often give off a foul, musty odor. You might also notice stunted growth or sudden leaf drop that doesn’t match the plant’s normal cycle.
It’s easy to confuse these signs with underwatering, but the soil moisture tells the true story. Underwatered plants typically have dry, brittle soil and leaves that crisp at the edges. With root rot, the soil stays wet, and the plant looks sad despite plenty of water. If you’re unsure, carefully inspect the roots: a quick sniff test can be revealing. The sooner you identify the problem, the better your chances of saving the plant. In the next section, we’ll walk through immediate steps to rescue a struggling plant and adjust your balcony pot setup to prevent future rot.
Choosing Balcony Pots with Built-in Drainage
You've learned to spot early signs of root rot; now let's stop it before it starts. The container you choose is your plant's first defense against too-wet roots. Here's how to pick pots that keep your balcony garden thriving.
Must-Have Drainage Holes
Every pot needs drainage holes—no exceptions. Aim for multiple holes at least 1/2 inch wide. For small pots (under 10 inches), one central hole can work, but larger containers benefit from three or more evenly spaced holes to prevent water from pooling in pockets. If you're upcycling a container, drill extra holes yourself. A power drill with a masonry or ceramic bit handles most materials, and a few extra minutes now save you from root rot later.
Best Pot Materials for Drainage
- Terracotta: The classic breathable choice. Porous clay wicks moisture from the sides, helping soil dry more evenly. It's ideal for succulents, herbs, and any plant prone to rot. Just remember terracotta dries out faster, so you'll water more often in summer.
- Plastic: Lightweight and affordable, plastic holds moisture longer—a plus if you sometimes forget to water. But plastic must have ample drainage holes; never assume a plastic pot comes ready to use. Check the bottom before buying, and add holes if needed.
- Fabric pots: These are game-changers for root health. Made from breathable geotextile, they air-prune roots and drain so well that overwatering is nearly impossible. They're perfect for tomatoes, peppers, and leafy greens. On a balcony, choose lighter colors to reflect heat, and be prepared to water more frequently.
Self-Watering Pots: Proceed with Care
Self-watering containers have a water reservoir below the soil, wicking moisture upward. They can reduce watering chores and keep moisture consistent—great for thirsty plants like basil or ferns. But for plants that like to dry out between waterings (snake plants, succulents), these pots can keep roots too wet if you refill the reservoir without checking soil moisture first. Always use a well-aerated potting mix in self-watering pots, and periodically let the reservoir run dry to avoid soggy conditions.
Say No to Decorative Pots Without Holes
That gorgeous glazed ceramic pot catches your eye, but if it lacks drainage holes, it's a trap for root rot. You can still use it—just treat it as a cachepot. Plant in a simple plastic nursery pot with holes, then slip that inside the decorative one. Lift it out when watering, let it drain completely, and pop it back. This trick gives you style and healthy roots without compromise.
A Quick Start Cheat Sheet
- Always check for drainage holes before buying a pot.
- If a pot doesn't have holes, drill them yourself or use it as a cachepot.
- Match the pot material to your plant's moisture needs: breathable terracotta or fabric for dry-soil lovers; plastic for steady moisture.
- Elevate pots with feet or pot risers to help excess water escape and improve airflow underneath.
With the right pot, you've already won half the battle against root rot. Next up: the perfect soil mix to keep water moving.
Creating the Perfect Well-Draining Potting Mix
To give your balcony plants the best chance at a healthy root system, start with the right mix. Regular garden soil is too heavy for containers—it compacts easily, suffocating roots and holding water like a sponge. Instead, reach for a high-quality potting mix formulated for containers. Look for blends that list ingredients like peat moss, coconut coir, or composted bark as the base. These materials are lightweight, fluffy, and encourage air pockets that roots love.
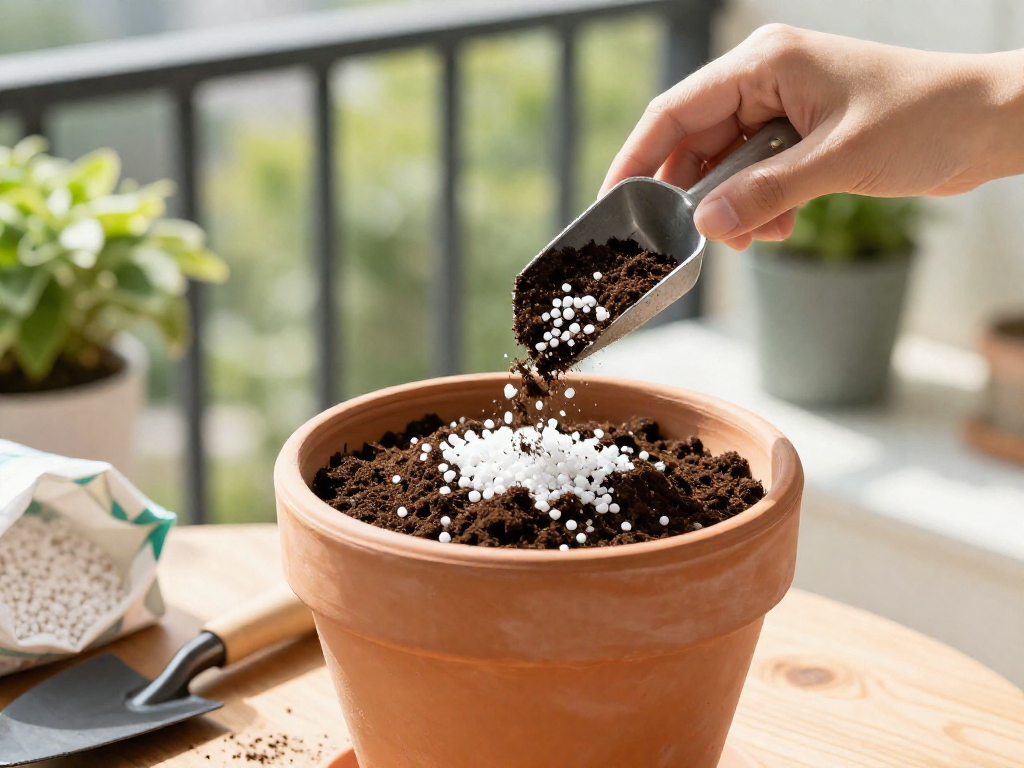
But even the best potting mix can benefit from extra amendments to boost drainage. Mix in about 20–30% perlite, pumice, or coarse horticultural sand. Perlite is those little white pellets you see—they’re super lightweight and create air channels. Pumice is heavier and doesn’t float up over time, making it excellent for larger pots. Coarse sand (not fine beach sand) also improves porosity, but avoid it if it has heavy clay-like particles. Stir these amendments evenly into your potting mix before filling your pots.
Now, you might see water-retaining crystals or gels on the shelf. While they promise to reduce watering, they can be counterproductive for root rot prevention. These polymer crystals soak up moisture and slowly release it, which is helpful in scorching, dry climates where pots would otherwise dry out too fast. But in most US balconies, especially those with indirect light or high humidity, they keep the soil too wet for too long, increasing rot risk. If you live somewhere like Phoenix with intense heat and are away all day, you might use them sparingly in certain pots—but for the majority of us, skip them.
And we have to address the old myth: putting a layer of gravel, pebbles, or pot shards at the bottom of the pot “for drainage.” It’s time to toss that advice out the window. It doesn’t help water drain better; in fact, it creates a perched water table—a zone of saturated soil just above the gravel layer that never really dries out. That soggy soil hugs the roots and invites rot. Instead, focus on that well-draining mix and a pot with proper drainage holes. Your plants will thank you with strong, white roots and vigorous top growth.
Mastering Watering Habits to Prevent Overwatering
Overwatering is one of the quickest ways to invite root rot into your balcony garden, but it’s also one of the easiest mistakes to fix once you know what to look for. The key is to water based on what your plants actually need—not on a rigid schedule. Before you reach for the watering can, always check the soil moisture first.
For a quick, budget-friendly option, use the finger test: push your finger into the soil up to the second knuckle. If it feels dry at that depth, it’s time to water; if it’s still damp, wait a day or two. If you prefer a more precise tool, a moisture meter can take the guesswork out entirely. These little gadgets are inexpensive and clearly show whether the soil is dry, moist, or wet at root level.
When you do water, make it count. Give each pot a thorough soak so that water runs freely out of the drainage holes. This deep watering encourages roots to grow downward, creating stronger, more resilient plants. However, resist the urge to water frequently—most balcony plants prefer a good drink less often rather than small, daily sips. How often you water will shift with the seasons: in hot summer months, your pots may need water every day or two, while in cooler weather or during rainy periods, you might only water once a week. Get to know each plant’s preferences, too. Succulents and cacti want to dry out completely between waterings, while ferns and leafy herbs like consistently moist (but never soggy) soil.
One often-overlooked habit is what happens right after watering. Let the pot finish draining, but don’t leave it sitting in a full saucer for more than 30 minutes. Empty that excess water promptly. Standing water at the bottom keeps the soil saturated and blocks oxygen from reaching the roots, creating the perfect environment for rot. If your setup makes it tricky to reach saucers, consider using pot feet or swapping to saucers that attach after watering. Your plants will reward you with healthy roots and vibrant growth.
Seasonal Drainage Adjustments for Balcony Gardens
Balcony gardens face unique seasonal challenges, especially when it comes to drainage and moisture control. Here’s how to adjust your care routine throughout the year to keep roots healthy and rot-free.
Shield pots from heavy rain. Sudden downpours can saturate soil and overwhelm even well-draining pots. When storms are forecast, move containers under an awning, onto a covered porch, or even just closer to the building for shelter. If moving isn’t possible, cover pots temporarily with a plastic sheet, a trash bag, or a purpose-made pot cover—just remove it once the rain passes so air can circulate.
Cut back watering in winter. As temperatures drop and daylight fades, most plants slow their growth and sip far less water. Overwatering during cool months is a top cause of root rot. Check the top inch of soil and water only when it feels dry—this might mean stretching your usual interval by days or even weeks. Remember, a moisture meter is your friend, especially for plants that like to stay on the dry side in dormancy.
Lift pots for airflow all year. Even a tiny gap between the pot and the balcony floor makes a big difference. Pot feet, furniture risers, or simple shims let excess water drain freely and stop saucers from sealing the bottom. This helps roots breathe and prevents cold, wet soil from clinging to the container base—a real lifesaver during damp, chilly stretches.
Watch indoor heated balconies. Enclosed or sunroom-style balconies that are heated in winter can fool you: the air is dry, but the soil may still hold moisture longer than you think. Heat can also speed evaporation from the top while the root zone stays soggy. Check plants more often, but don’t water on a schedule. Instead, feel the soil or lift the pot to gauge weight. Adjust gradually and observe how each plant responds.
Seasonal adjustments don’t need to be complicated. A little attention to your balcony’s changing conditions—rain, cold, indoor heat—will go a long way toward preventing root rot and keeping your garden thriving year-round.
Emergency Fixes for Root Rot in Progress
If you’ve spotted mushy, discolored roots or your plant is wilting despite moist soil, it’s time to act fast! Root rot can spread quickly, but with a few emergency measures, you may still save your balcony plant.
Step 1: Unpot and Inspect Carefully slip the plant out of its pot and gently shake off all the wet soil. Rinse the roots under lukewarm water to see the damage clearly. Healthy roots are firm and white or light tan; rotten ones are brown, black, mushy, or slimy.
Step 2: Trim Away the Rot Using clean, sharp scissors or pruners (sterilize them with rubbing alcohol first), snip off every affected root. Cut slightly above the rotted area to remove it completely. If the rot has spread to the base of the stem or crown, trim that away too—better to lose some growth than the whole plant.
Step 3: Optional Hydrogen Peroxide Rinse To kill lingering pathogens, you can soak the remaining healthy roots in a 3% hydrogen peroxide solution (one part peroxide to two parts water) for 5–10 minutes. This step is optional but can boost recovery. Rinse with clean water afterward.
Step 4: Repot in Fresh, Dry Mix Throw away the old soil—don’t reuse it, as it’s full of rot-causing fungi and bacteria. Choose a clean pot with ample drainage holes, or add more if needed. Fill it with a fresh, well-draining potting mix (ideally one that includes perlite, pumice, or coarse sand). Replant your trimmed specimen at the same depth it was before.
Step 5: Quarantine and Reduce Watering Place the repotted plant away from your healthy ones for a few weeks to prevent cross-contamination. Do not water it immediately after repotting; wait until the top inch of soil is dry to the touch. Then water sparingly, just enough to keep the mix slightly moist, never soggy.
Supporting Recovery Keep the plant in bright, indirect light and avoid fertilizing for at least a month—the recovering roots can’t handle strong nutrients yet. Expect some leaf drop or wilting; this is normal as the plant redirects energy to root healing. With patience and lighter watering habits, most plants bounce back in a few weeks.
Remember, the key is catching root rot early and adjusting your care routine. Even if you lose a plant, you’ve learned vital skills for your balcony garden’s future health.
FAQ
What is root rot and what causes it?
Root rot is a fungal disease that destroys roots, turning them mushy and brown. It is primarily caused by overwatering or poor drainage, which suffocates roots and allows pathogens to thrive in consistently wet soil.
How can I tell if my plant has root rot or just needs water?
Check the soil moisture first: if it's soggy, the plant likely has root rot. Gently remove the plant from the pot and examine the roots; healthy roots are firm and white, while rotten roots are brown, soft, and may smell bad. Wilting leaves can indicate both conditions, but if the soil is dry and the plant perks up after watering, it's just thirsty.
Can a plant recover from root rot?
Yes, if caught early, many plants can recover. Trim away all affected roots with sterile scissors, repot in fresh, well-draining soil, and adjust watering. Recovery depends on the plant species and extent of damage.
Do I need to add gravel at the bottom of pots for drainage?
No, adding gravel does not improve drainage and can actually hinder it by creating a perched water table. Instead, ensure pots have drainage holes and use a high-quality, well-aerated potting mix.
How often should I water my balcony plants in summer?
It depends on the plant, pot size, and weather, but generally, check soil moisture daily by sticking a finger an inch deep. Water thoroughly when the top inch feels dry, typically every 1-2 days during hot, windy spells. Mulching can help retain moisture.