Fall Bulb Planting for Spring Balcony Blooms
Imagine stepping onto your balcony next spring to a burst of colorful tulips, daffodils, and hyacinths. With fall bulb planting, you can make it happen—even in containers. This guide walks you through choosing, layering, and protecting bulbs so small-space gardeners enjoy a spectacular spring show.
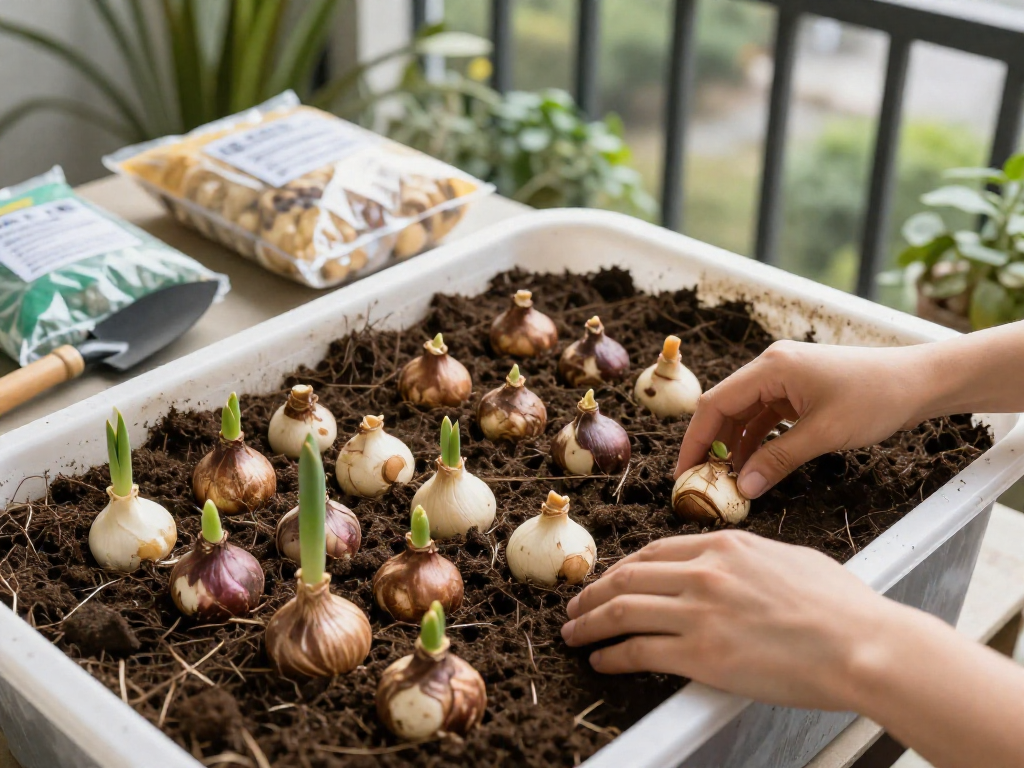
Why Fall Is the Time to Plant Spring Bulbs on Your Balcony
Spring-flowering bulbs like tulips, daffodils, and crocuses rely on a cold period to spark root growth and trigger blooms. On a balcony, fall planting harnesses the natural winter chill, giving your bulbs the dormancy they need right in their containers. Without this cold stretch, you’d end up with leaves but no flowers come spring.
Balcony containers do warm up and cool down faster than garden soil, so a little timing tweak goes a long way. Wait until temperatures reliably dip to about 40–50°F at night before tucking your bulbs in. If your building holds heat or you face a very shaded corner, you might plant a week or two later than ground gardeners. You can also cluster pots together or insulate them with burlap to steady the temperature swings.
Getting your hands in the soil now pays off when your balcony wakes up early next year. While other plants are still sleeping, your bulbs push through with cheerful color—often before the last frost. That surprise of green in late winter is pure balcony magic, proving that even the smallest outdoor space can burst into life ahead of the season.
Top Flower Bulbs for Container Planting (Balcony-Friendly Picks)
Choosing the right bulbs is the secret to a balcony that bursts into life in spring. The best picks for containers are compact, sturdy, and able to thrive in limited soil. Here’s a roundup of crowd-pleasers, each with a little twist that makes them especially suited to your high-rise oasis.
Tulips: The Color Chameleons
Tulips offer an almost endless palette—from velvety reds to soft pastels and even fringed or parrot varieties. They’re container superstars, but on a balcony, think of them as one-season wonders. Many tulips don’t reliably return year after year in pots, so plant fresh bulbs each fall for guaranteed impact. Go for shorter types like ‘Greigii’ or ‘Double Early’ to keep them resilient against gusts.
Daffodils: The Easygoing Returners
If you want a bulb you can practically ignore and still enjoy for seasons to come, daffodils are your answer. These perennials naturalize beautifully in pots, and their cheerful yellow, white, or peachy cups are pest-resistant—squirrels and deer won’t bother them. Compact varieties like ‘Tête-à-Tête’ or ‘Minnow’ are tailor-made for small spaces, standing only 6–12 inches tall and forming neat clumps.
Crocus: The Early Birds
Crocuses are among the first to peek through late winter snow, often blooming while it’s still chilly. Their petite, goblet-shaped flowers fit perfectly in shallow containers or even tucked into the edge of larger pots. Plant them in clusters for a carpet of lavender, gold, or white. They’re also stellar for succession planting—just as they fade, later bulbs will take over the show.
Hyacinths: Fragrant Powerhouses
For a sensory treat, few bulbs beat hyacinths. Their dense, star-shaped florets pack intense perfume into a compact spike. Modern cultivars stay neat and upright, rarely flopping, so they’re ideal for windy balconies. Pair deep purple ‘Woodstock’ with creamy ‘Carnegie’ in a single pot for a dramatic, fragrant centerpiece.
Alliums: The Showstoppers
For height and whimsy, alliums deliver perfectly round globes that seem to float above the foliage. Varieties like ‘Purple Sensation’ or the smaller ‘Mount Everest’ add architectural flair without overwhelming a container. Their sturdy stems laugh at breezes, and dried seed heads provide texture later on.
Timing Your Blooms for Continuous Color
A balcony garden shines brightest when something’s always in bloom. Mix early-blooming crocuses and hyacinths with mid-spring daffodils and later tulips. Then plug in alliums for a late-spring finale. By choosing bulbs with staggered bloom times, you’ll have an ever-changing display from March through May.
Balcony-Smart Planting Tips
Wind is public enemy number one for balcony gardeners. Opt for shorter cultivars or those with naturally strong stems—think dwarf iris, grape hyacinths, or ‘Species’ tulips instead of towering Darwin hybrids. If a favorite taller variety calls your name, plant it deeper or cluster pots together so plants shelter one another. Sturdy pots and well-draining soil also keep bulbs standing tall.
How to Layer Bulbs in a Container for Continuous Blooms (Lasagna Method)
If you dream of a balcony that bursts with color from early spring right into summer, the lasagna planting method is your secret weapon. This layering technique lets you pack multiple types of bulbs into a single container, giving you a continuous wave of blooms as each variety takes its turn. It’s incredibly space-efficient—perfect for small balconies—and creates a lush, full display that feels anything but cramped.
What you need: A deep container with drainage holes (aim for at least 12–14 inches tall so roots have room). A well-draining potting mix amended with compost and a slow-release bulb fertilizer. And your chosen bulbs—typically three layers: large/late, mid-season, and small/early.
Step-by-step layering: 1. Start by adding a few inches of soil to the bottom of your pot. 2. Place your largest, latest-blooming bulbs first—think tulips or alliums. Set them pointy side up, spacing them shoulder-to-shoulder but not touching. Cover with soil until just the tips peek out. 3. Next, add your mid-season bulbs such as daffodils or hyacinths. Again, nestle them close together, then cover with more soil. 4. For the top layer, go with the smallest, earliest bloomers like crocuses or grape hyacinths. These little beauties will pop up first in spring. Cover them with the final layer of soil, about 2–3 inches from the rim. 5. Water thoroughly right after planting to settle the soil and kick-start root growth. Keep the container in a cool, sheltered spot over winter (balcony corners work great).
The payoff? A single pot that delivers weeks of blooms, starting with dainty crocuses poking through in late winter, followed by cheerful daffodils, and finally dramatic tulips ushering in warm weather. Don’t be afraid to pack them in—as long as bulbs aren’t touching, this dense planting gives a spectacular “bouquet” effect. Just make sure your pot never sits in soggy soil; good drainage is the golden rule of bulb lasagna.
Overwintering Bulb Containers on a Balcony: Chilling and Protection
Once your bulbs are tucked into their containers, the next question is how to keep them safe through winter. Balcony conditions can be harsher than in-ground gardens—pots freeze faster, dry out quicker, and sit exposed to wind. But with a few thoughtful steps, your bulbs will get the chill they need without turning to mush.
Choose a Sheltered Spot
Place containers against a building wall or under an overhang. This reduces the swing between daytime thawing and nighttime freezing that can damage bulbs. A covered corner that stays persistently cold but not subject to rapid temperature shifts is ideal. Avoid spots that catch winter sun directly, as this can cause premature sprouting.
Insulate the Pots
Wrap containers with bubble wrap, burlap, or old blankets to buffer the roots. For extra protection, nest the planted pot inside a slightly larger container and fill the gap with straw, leaves, or packing peanuts. This creates an insulating air pocket. If you use decorative outer pots, make sure they have drainage so water doesn’t pool and freeze.
Water Wisely
Once temperatures drop, drastically reduce watering—damp, not wet, is the goal. Check every few weeks; if the soil is bone dry, give just a light sip near the pot edge. Too much moisture invites rot, but complete desiccation can kill the roots. In rainy regions, tilt pots slightly or move them under cover to prevent waterlogging.
Extra Steps for Very Cold Zones
If you garden in USDA zone 5 or below, consider moving containers into an unheated garage, storage locker, or enclosed balcony closet for the coldest months. The temperature should stay between 35–45°F (2–7°C). Alternatively, pre-chilled bulbs sold as “ready to plant” skip the winter uncertainty—just pot them up in late winter and they’ll bloom on schedule.
Lift and Label
Set pots on bricks, pot feet, or a wooden pallet to keep them off an icy floor and allow drainage. This also prevents the container from freezing to the surface. Finally, label each pot clearly with the bulb names and planting date so you’ll remember what’s where when spring arrives.
With these precautions, your balcony bulbs will weather winter beautifully, waking up to deliver a cheerful parade of color just when you need it most.
Spring Awakening: What to Do When Shoots Emerge
After months of patient overwintering, those first green tips pushing through the soil are a reward worth waiting for. Spring on a balcony means changing light, warming temperatures, and a shift in care. Here’s how to guide your bulbs from first shoots to full bloom—and beyond.
Gradually Remove Winter Insulation
If you wrapped pots in bubble wrap or burlap, don’t strip it all at once. Daytime temperatures may feel mild, but nights can still dip close to freezing. Over a week or two, loosen or remove layers during warmer days, replacing them if frost threatens. This gradual exposure helps shoots adjust without shock.
Follow the Sun
As the sun climbs higher, your balcony’s light pattern changes. Shoots emerging in shade will stretch, becoming weak and floppy. Once you see green, move containers to the sunniest microclimate you have—usually a south-facing rail or a corner that catches midday light. Even a 30-centimetre shift can make a noticeable difference in stem strength and flower count.
Water with a Light Touch
It’s tempting to drench dry-looking soil, but overwatering is the fastest way to rot roots in cool spring weather. Check moisture by pressing a finger an inch into the pot. Water only if it feels dry at that depth, and always empty cache trays after half an hour so pots never sit in water. Aim for slightly damp, like a wrung-out sponge.
Feed When Leaves Reach 7–10 cm
Young shoots don’t need fertilizer right away; the bulb itself is a packed lunch. Once leaves are a few inches tall, start a dilute liquid feed every 10–14 days. Use a balanced organic fertilizer at half the strength recommended on the label. This gentle boost supports big blooms and healthy bulb energy for next year.
Deadhead, but Leave the Leaves
When flowers fade, snip off the spent heads to prevent seed from stealing energy. Stop there. Those strappy leaves are solar panels, charging the bulb for next spring. Allow them to yellow and collapse naturally—this takes about six weeks. Tuck pots behind a small table or screen if the dying foliage bothers you, but don’t cut or fold the leaves early.
Plan for a Summer Show While Foliage Fades
You don’t have to stare at withering leaves for weeks. As bulb foliage starts to yellow, plant heat-loving annuals like petunias, calibrachoa, or dwarf zinnias around them. By the time it’s warm enough for annuals to take off, the bulb leaves will have completed their work. The old foliage can be gently removed, leaving you with a container already bursting with summer colour.
FAQ
Can I plant spring bulbs in fall if I live in a warm climate?
Yes, but you'll need to pre-chill bulbs that require a cold period, like tulips, in the refrigerator for 10-14 weeks before planting. Choose bulbs suited for warm climates, such as paperwhite narcissus or Dutch iris. Plant in late fall when temperatures cool for best results.
How deep should bulbs be planted in containers?
Generally, plant bulbs two to three times as deep as the bulb is tall, measuring from the bulb's base. For containers, you can layer bulbs at different depths—larger bulbs deeper, smaller ones shallower—to create a continuous bloom display. Ensure pots have drainage holes to prevent rot.
Do I need to water bulbs after planting?
Yes, water thoroughly after planting to settle the soil and initiate root growth. Keep the soil lightly moist but not soggy throughout fall and winter, as container soil dries faster than ground soil. Reduce watering if your balcony is exposed to rain.
Can I reuse the bulbs next year?
Many spring bulbs can be reused if allowed to die back naturally and stored properly. After flowering, let the foliage yellow and wither, then dig up the bulbs, clean them, and store in a cool, dry place until fall replanting. However, some bulbs like tulips may produce fewer blooms in containers and are often treated as annuals.
What if my balcony gets no sun in winter?
Most bulbs need sunlight only when foliage emerges in spring, so winter shade is fine. Choose early bloomers like snowdrops or crocuses that tolerate part shade. Place containers where they’ll get sun when shoots appear, or use reflective surfaces to maximize light on your balcony.
How do I prevent squirrels from digging up bulbs?
Cover the soil surface with wire mesh or chicken wire after planting, securing it well. You can also plant bulbs under a layer of gravel or top-dress with sharp-edged materials like crushed shells. Another trick is to interplant with daffodils, which squirrels avoid, to protect tastier bulbs.