Macrame Plant Hanger from Upcycled T-Shirt Yarn
Transform forgotten tees into a stylish, space-saving plant hanger that brings boho charm to your urban balcony.
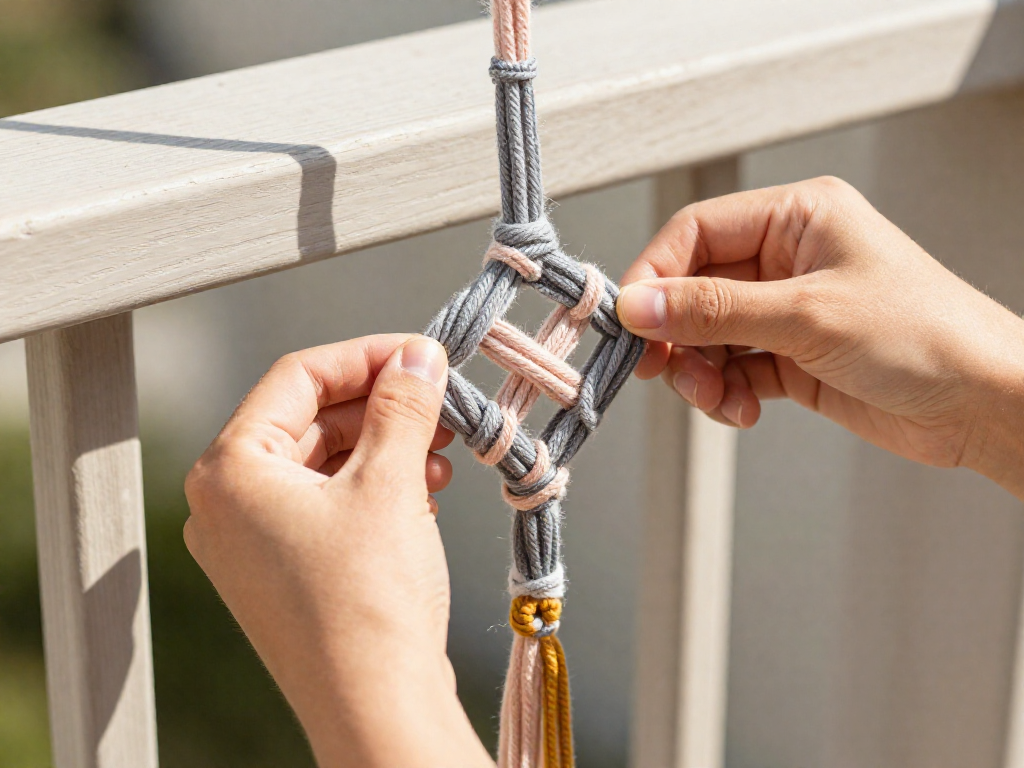
Why Make a Macrame Plant Hanger from T-Shirt Yarn?
Transforming a stack of worn-out tees into a gorgeous plant hanger is one of those rare projects that ticks every box for a small balcony gardener. It’s practical, planet-friendly, and gives your outdoor nook a dose of boho charm without costing a cent—or sacrificing precious floor space.
The zero-waste angle is hard to beat. Instead of buying new cotton cord, you upcycle shirts that might otherwise sit in a drawer or end up in a donation pile. That soft, stretchy jersey fabric is ideal for macrame: it’s gentle on pots, so you won't scratch or crack delicate ceramics, and the squishy texture makes it forgiving to tie, even if you’re new to knotting. Each t-shirt brings its own color, so you can mix stripes, fades, or solid hues to create a completely custom look that matches your balcony’s personality.
In a compact urban space, going vertical is a game changer. A hanging planter lifts greenery off the floor, freeing up room for a bistro chair, a tiny table, or simply more plants. The swaying, layered effect adds instant texture and softness against harsh railings or brick walls, turning a plain balcony into a layered, cozy retreat. And because you’re working with materials you already own, the project is as budget-friendly as it gets—no special tools or expensive cords required.
Every knot you tie puts your stamp on your space. You can play with simple spiraling patterns or keep it minimal, adjusting the length to suit a sunny corner or a shaded overhang. By the time you hang it up, you’ll have a piece that’s both functional art and a conversation starter. It’s proof that small, sustainable choices can make your balcony feel bigger, brighter, and deeply yours.
Materials and Tools Needed
Before you dive into knotting, take a moment to gather everything you’ll need. Most of these items are either already lying around your apartment or easy to find, keeping the project budget-friendly and low-waste.
- Old t‑shirts – Cotton or cotton‑spandex blends (think classic tees, not sportswear). T‑shirts without side seams give the smoothest yarn, but even standard tees work beautifully. Aim for 3–4 large shirts for a medium hanger.
- Fabric scissors – Sharp fabric scissors or a rotary cutter and cutting mat make quick work of turning tees into yarn. Dull scissors will fight you and give ragged edges.
- Ruler or measuring tape – Consistent strips mean even knots, so keep a ruler handy.
- Large‑eye tapestry needle (optional) – Handy for weaving in loose ends neatly, but a crochet hook or even your fingers can work in a pinch.
- Anchor hook – An S‑hook, carabiner, or over‑door hook lets you hang your work as you knot, keeping tension even and saving your shoulders.
- Plant pot with drainage – Lightweight plastic or terracotta. Make sure it has a drainage hole and a saucer to protect your balcony floor. Pick a pot size that matches your hanger; a 4–6 inch pot is a great starting point.
- Optional extras – A wooden ring for the top loop gives a polished finish, and wooden beads threaded onto cords add a boho touch.
Once you have everything together, clear a lap‑friendly space—maybe a coffee table or even your lap on the couch—and you’re ready to turn old shirts into a plant’s new home.
How to Make T-Shirt Yarn
Turning old T-shirts into soft, stretchy yarn is a satisfying way to upcycle fabric you might otherwise toss. With a few simple cuts and a good tug, you’ll have a continuous strand ready for your macrame plant hanger.
Pick the right tee – Choose a shirt with a solid color and lightweight jersey knit. Skip heavily printed designs; the ink can feel stiff and resist curling. Light-colored tees show off your knots best, but don’t be afraid to mix shades for a boho look.
Prep the shirt – Lay it flat and cut straight across just below the underarm seams to remove the top portion. Snip off the bottom hem as well. You’ll work with the cylindrical body of the shirt, a perfect tube of fabric.
Cut the strips – Starting at the bottom raw edge, cut horizontal slits about 1 inch wide, stopping about 1 inch before you reach the opposite side. This leaves an uncut spine along one side. When you reach the end, open the tube so it lies flat, then cut diagonally from the end of one slit to the start of the next, creating a single continuous strip. It’s like cutting a spiral all the way through the fabric. Take your time and keep the strips even – wider strips give chunkier yarn, narrower ones are more delicate.
Turn strips into yarn – Grab the strip at one end and give it a firm, steady pull. The edges will naturally curl inward, forming a smooth, rounded cord. Stretch it a little as you go to encourage the curl and even out any bumps. This is the magic moment when scraps become yarn.
Join multiple strips – One shirt won’t yield enough for a full hanger. When you need to add a new strip, tie the ends together with a small, tight knot. For a cleaner look, you can sew the ends or overlap them and secure with a drop of fabric glue, but a discreet knot works just fine. Keep the joins small so they don’t create bulky lumps in your macrame.
How much yardage? – A single large adult T-shirt typically gives about 15 to 20 yards of yarn. For a standard three-tier macrame plant hanger that hangs about 3 feet long, aim for 60 to 80 yards total. That translates to roughly three or four shirts. If you use XL or 2XL tees, you’ll get even more length per shirt. Collect a few from your closet, thrift store, or friends, and you’re ready to start knotting.
Mastering Two Simple Macrame Knots
Before diving into the full plant hanger, it's helpful to get comfortable with the two essential knots you'll use: the overhand knot and the square knot. These are the building blocks of your project, and once you master them, you'll be able to create a sturdy, beautiful holder.
Start with the overhand knot. This is the simplest knot in macrame, often used as a stopper to gather cords together. To practice, take a small bundle of your t-shirt yarn strips—maybe three or four strands—and hold them together. Form a loop by crossing the working end over the standing part, then pass the end through the loop from behind and pull tight. That's it! You've created a basic overhand knot. It's perfect for securing the top of your hanger where all the cords come together, or for adding detail to the bottom. The key is to pull it evenly so the knot sits neatly without twisting the fabric.
Next, tackle the square knot, which forms the main body of the hanger. For this, you'll work with four cords. Two middle cords act as filler cords, while the left and right cords are your working cords. To tie a square knot, bring the left working cord over the two middle cords and under the right working cord. Then take the right working cord under the middle cords and over the left working cord, pulling both ends to tighten. That's the first half. To complete the knot, mirror the process: bring the right working cord over the middle cords and under the left working cord, then pass the left working cord under the middle cords and over the right working cord. Tighten again, and you'll see a neat, flat knot form.
A common variation you'll use is the alternating square knot, which creates a lovely net pattern. After tying a row of square knots across your cords, on the next row, split the groups so the two middle cords from one knot become the outer cords for the new knots in the row below. This offset arrangement gives the hanger its classic open weave, perfect for cradling a pot.
Because t-shirt yarn is stretchy and slightly thicker than traditional cord, tension matters. Practice a short sampler strip—maybe a dozen rows of alternating square knots—to get a feel for how tightly to pull. You want the knots snug but not so tight that they distort the fabric. A consistent tension will give your finished piece a polished look. If your first attempts look a little uneven, don't worry; the softness of the yarn is forgiving, and after a few inches, your rhythm will feel natural.
Once you're comfortable, you'll be ready to start the actual hanger with confidence, knowing these two simple knots can be combined to make something both functional and beautiful.
Step-by-Step Plant Hanger Pattern
Grab your favorite pot and let’s turn your t-shirt yarn into a beautiful plant hanger. You’ll use the lark’s head and square knots from the previous section, plus a simple gathering knot for the bottom. Cut eight strands of yarn, each about three yards long. Fold them in half and attach them to your ring with a wrapped knot or simply loop them over the ring and secure with a lark’s head—whichever feels sturdier to you. Now separate the 16 individual cords into four groups of four. In each group, tie six to eight square knots straight down. This forms the “basket” that cradles your pot. Next, drop down about two to three inches and begin connecting the groups: take the two right cords from one group and the two left cords from the group next to it, and tie a square knot. Repeat this alternating pattern for four or five rows, creating a lovely net-like tube. Slide your pot in to test the fit. If it’s snug and the top sits at the right height, you’re golden. If not, just undo a row or two and adjust the spacing—this is very forgiving. Once the fit is perfect, gather all the cords together and tie a large overhand knot right under the pot to hold everything in place. Trim the fringe to your liking, usually six to eight inches below the knot. For a playful touch, add a bead or two to some cords before tying the bottom knot—just thread them on and watch them pop against the soft yarn.
How to Hang and Style Your Planter on a Balcony
Your macramé hanger is ready—now let’s get it up on the balcony. Explore these attachment options, but always check weight limits and your lease first.
Secure the hanger safely
- Ceiling hook: If your balcony has a solid overhead surface, a sturdy screw-in hook can hold several pounds. Look for hooks rated for at least double the weight of your planted pot.
- Wall bracket: For walls, install a heavy-duty bracket and extend the hanger outward to avoid crowding walking space.
- Tension rod: A well-fitted tension rod between two walls or in a nook works beautifully, especially if drilling isn’t allowed. Ensure it’s tightened securely.
- Railing clamp: Clamp-on hooks or plant hangers designed for railings are perfect for hanging plants along the edge. Make sure the clamp fits your railing’s width and won’t damage it.
Choose the right pot and plant
T‑shirt yarn is soft and slightly stretchy, so it’s happiest cradling lightweight plastic or resin pots. Avoid heavy ceramic or stone pots that could strain the knots. Stick with small to medium containers that drain well.
For a lush urban jungle, pick trailing or cascading plants: - Pothos and philodendron are nearly indestructible and thrive in moderate light. - String of pearls adds quirky texture and looks stunning spilling over the sides. - Spider plant babies dangle playfully and adapt to many conditions.
Style for impact
- Layer heights: Hang planters at different levels to create depth. A staggered trio draws the eye upward and makes your balcony feel fuller.
- Add sparkle: Weave fairy lights through the macramé or attach small clip‑on light strings. For extra charm, slide wooden or glass beads onto the yarn before knotting.
- Coordinate colors: If you used brightly dyed T‑shirt yarn, echo those hues in your pots or outdoor cushions for a cohesive look.
A note on sun and weather
T‑shirt yarn is durable but not immune to the elements. Direct afternoon sun can fade colors over time—rotate your hangers or pick a partially shaded spot. In heavy rain, strong winds, or extreme heat, bring the hanger indoors temporarily; the yarn may stretch or weaken when soaked. Consider spraying with a UV‑protective fabric treatment to extend its life.
FAQ
Can I use other types of fabric instead of t-shirts?
Yes, you can use other stretchy knit fabrics like old leggings or jersey sheets. Just avoid woven fabrics like denim or canvas, as they don’t have the necessary give and may not hold knots well.
How much weight can the hanger hold?
A well-knotted t-shirt yarn hanger typically holds up to 5–8 pounds safely. For heavier ceramic pots, consider doubling the yarn strands or using a more rigid knot design for extra support.
Will the yarn stretch and cause the pot to droop?
Some initial stretching is normal, especially when first hung with weight, but it should settle. To minimize drooping, pre-stretch your yarn by lightly tugging on each strand before knotting.
How many t-shirts do I need for one plant hanger?
For a standard three-arm hanger, you’ll need about 2–3 adult-sized t-shirts, depending on cut width and desired thickness. Using similar colors or a mix can create a lovely ombre effect.
Is it washable, and how do I clean it?
Yes, it’s washable; most t-shirt yarn is machine-friendly. Wash on a gentle cycle with cold water and air dry to prevent further stretching or shrinking. Spot cleaning between deep washes works too.